
Disclaimer: This blog post may contain affiliate links. If you click on one and make a purchase, I will make a small commission, at no extra cost to you. These are products I’ve personally used and stand behind, learn more.
Microblading, the good the bad and the ugly!
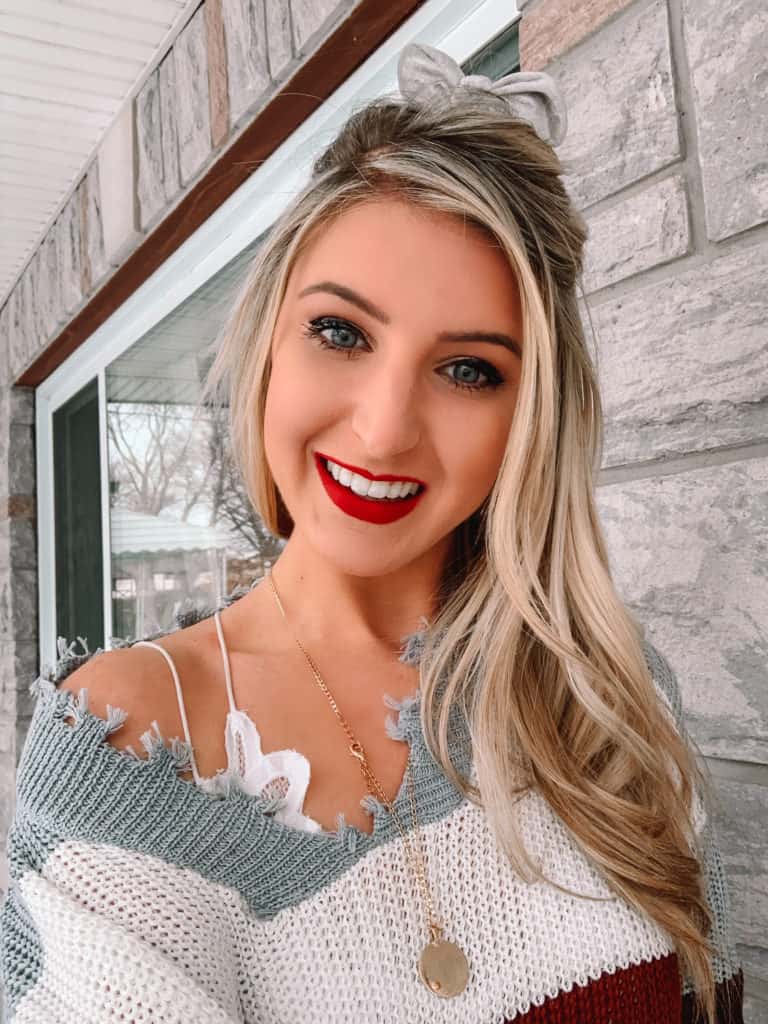
Today I’m talking all about my eyebrows, specifically my microblading experience! This was my first ever “cosmetic procedure”. I think it’s important to acknowledge that, even though microblading is so common, you are still puncturing the skin and creating a semi-permanent tattoo. Therefore, you want to be 100% ready when you go in for your first appointment!
I recently got my eyebrows microbladed by the amazing Julia from @vibewithlove (see her beauty portfolio here: @vibewithlovebeauty). If any of you girls are in the Toronto region I highly recommend checking out her page (also mention me “Prada and Pearls” to get $100 off your service PLUS if you refer a friend you can get $100 off your touch up)! I wanted to write a full blog post on my experience so you can understand what to expect if you’re planning on getting your brows done! I get it, a procedure like this can be scary and nerve-racking so below you will find a step by step of what will happen!!
Pre- Prep
I have to chat about this first since there are a couple of things I did before my appointment that helped (as always consult your artist for a full list of what they recommend):
- DO NOT TAKE/DRINK alcohol, caffeine, ibuprofen, aspirin, and fish oil supplements for at least 24 hours BEFORE your initial appointment
- Wear comfy clothing! This procedure takes on average around 2-3 hours when all is said and done (consultation, numbing, microblading etc).
- Avoid doing this procedure when you have your period! Your extra sensitive during this time frame and it may cause more pain than necessary
- Avoid waxing, tweezing or really doing anything to your brows a week before your appointment (your artist will shape and tweeze out unwanted hairs)
- Try not to tan – you might want to consider getting this treatment done in the winter
Initial Appointment
This is your first appointment out of two. You’ll start the initial appointment with a consultation – this is where your microblading artist will chat with you to understand the shape you want, the color and any questions you might have regarding the procedure. It might be handy to look into what you want before-hand to give your artist an idea, but you don’t have to. I personally went in open and let Julia decide the shape that would fit my face best!
Next step – drawing the shape! Here’s what mine looked liked (I die laughing every time I look at this):

Drawing the brows out is the most important step and usually takes longer than the microblading itself! Julia was extremely careful and took her time making sure everything was symmetrical and even!
Next your artist will apply numbing cream to your eyebrows so the procedure is less painful – the cream typically needs to be left on for at least 30 min before you start the procedure (for more info on the pain and other questions see the FAQ section at the bottom of this post):

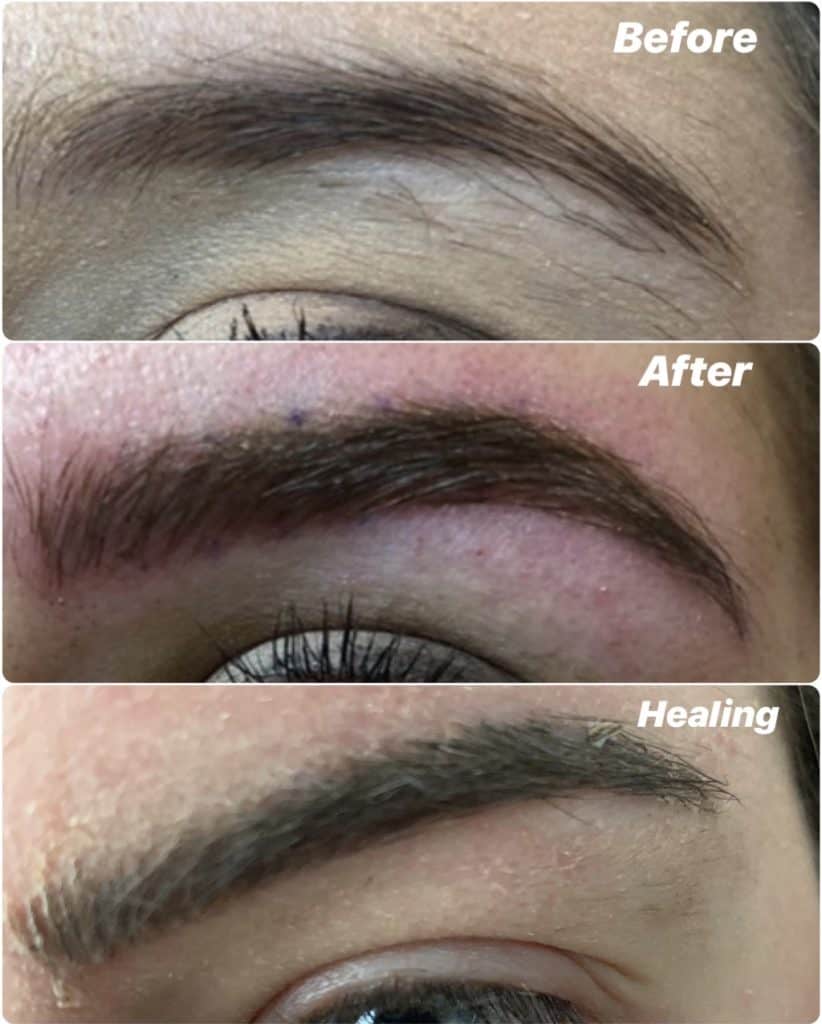
After you’re numbed, it’s time for the actual microblading service! Essentially what your artist is doing is creating thin superficial cuts throughout your brows and then depositing pigment. Usually, she will do this in 3 rounds with around 10-30 cuts per brow per round depending on your brows. Here is a photo once my pigment was applied and set into the cuts (so cuteeeeeeee lol):

After the pigment has set it’s wiped off and your good to go!
After-Care
After-care is SO IMPORTANT! This is what determines how long your brows last for (seriously – I’m not being dramatic).
Your brows will be extremely dark for 1-4 days after the procedure. The reason being, there will be some leftover pigment on them and your brows will start to scab (this is normal, all cuts heal with scabs). It is so important you don’t pick the scabs off or else you can pull out the pigment. Your artist will give you specific aftercare instructions that I recommend you follow closely.
You also need to avoid sweating and sun exposure for 2-3 weeks afterward. The sun exposure is a BIG one (which is why you might want to consider doing this in winter). This can cause your brows to fade.
There is a specific healing process when it comes to microbalding that can be very unsettling but it’s extremely normal. After the first week, the scabs start to fall off and so do your brows. I wish I was kidding. You might notice patches and areas of your eyebrows missing pigment. DO NOT BE ALARMED! This is normal. The pigment will reappear as your brows heal.
What to expect:
Day:
1 – My Brows look Great! Awesome!
2 – 4 – Wow why do my brows look so dark? This doesn’t look natural….oh no!
5-7 – My eyebrows are scabbing and literally falling off in chunks! I have patchy brows!
8-10 – Okay it looks like I didn’t get anything done to my brows
14- 28 – Pigment is retuning but doesn’t completely even.
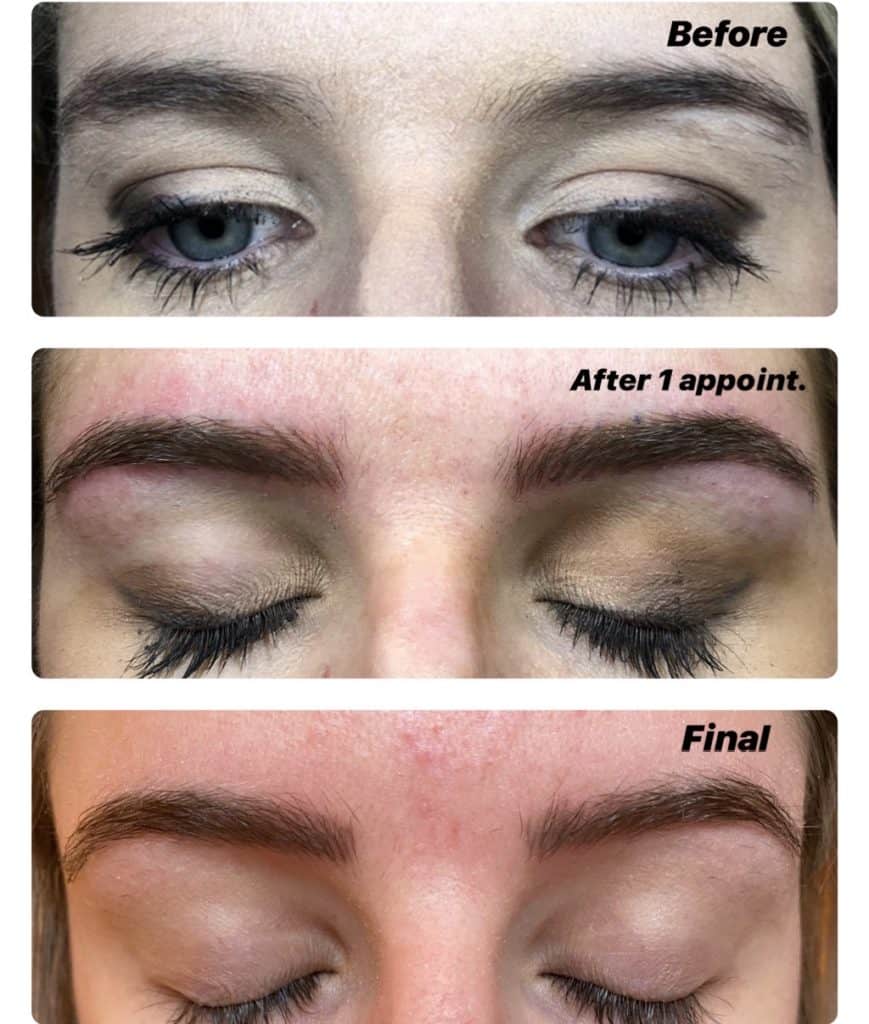
42 and/or (after touch up – see below) – These look great!
Second – Touch Up Appointment (Mandatory!)
The second touch up appointment should happen 6-8 weeks after your initial appointment. Basically you do the entire microblading process all over again including the healing process. The only thing that’s different is the drawing and the shaping of your brows should go faster since you already have a base. Also, the healing process after your second appointment won’t be as dramatic. You won’t notice as much fading as the first time around.
FAQ
1) What exactly is Microblading?
Microblading is a semi-permanent tattoo for your brows. It’s a procedure that consists of making small superficial cuts into the brow and applying pigment into the cuts to give you even, perfect brows!
2) How painful is Microbalding?
This is a tough question to answer because everyone is different. Your artist will apply a numbing cream to your brows to make the experience painless. With that said, everyone’s pain tolerance and skin type is different. I’m going to be completely honest, the numbing cream didn’t work on me at all and I felt everything (this is rare). For me, it was extremely painful. However, I have had some friends who have gotten it done by the same artist and fell asleep on the table! Yes, I repeat fell asleep on the table.
In summary, this procedure shouldn’t be too painful however for some people, like me, it is. You won’t really know until the numbing cream is on and the procedure starts. One tip I can give is to avoid this procedure when you have your period!
3) Does microblading look natural or like a tattoo?
Microbalding looks extremely natural since the “tattoo” part consists of extremely small fine lines that replicate the look of hair! Even up close I can’t tell that the hairs aren’t real. Also, the artist will make sure the shape and color are natural and matches your original hair color and shape.
4) How much does Microblading cost?
This depends on your artist, city, and country! If you’re in the Toronto region check out Julia at @vibewithlove (see her beauty portfolio here @vibewithlovebeauty)! If you mention me “Prada and Pearls” you can get $100 of your service also if you refer a friend you can get $100 off your touch up! See her price list here: Vibe With Love Microblading
5) How long does Mircoblading last?
This really depends on your lifestyle! Just like any tattoo, your skin type, sun exposure, and beauty routine will impact how long your brows last for. Realistically they will last around 8-12 months before they start fading. At this point, you want to consider going in for a touch-up.
6) How long does the whole procedure take?
The initial procedure will take anywhere from 2-3 hours. The reason being, you will have a consultation, shaping, numbing and the actual procedure. Your follow up appointment typically won’t take as long since the shape will be more defined from your first appointment.
7) How many appointments do you need? How does the second touch-up work?
After your initial appointment, you are required to go in for a touch-up appointment 6-8 weeks after your initial appointment. This is required to ensure your microblading lasts. After that, you can get touch-ups when needed (usually around the 1-year mark however you might not need a touch up until the 2-year mark depending on your skin type!)
8) Do you still have to fill in your brows after Microblading?
I rarely fill in my brows now! I will sometimes if any makeup gets on my brows but honestly guys day to day it looks like my brows are already filled in! I’ve actually had people ask me what pencil I use.
9) Would you recommend getting Microbalding done?
YES! Okay even though this service was extremely painful for me I’m over the moon happy with the results. My brows look 100X better than they did before and I don’t need to worry about filling them in. If you’re someone who doesn’t have much brow hair or your shape is off you should seriously consider this procedure. It’s a great way to get bold brows with little effort!
Wrap up!
If you’ve ever considered getting microblading done I highly recommend you do it! My brows look great and I don’t have to worry about filling them in anymore. If you’re in the Toronto region check out Julia at @vibewithlove (see her beauty portfolio @vibewithlovebeauty)! If you mention me “Prada and Pearls” you can get $100 of your service! Even though I experienced pain during my procedure it’s not common and is due to my skin/body. I would personally do this procedure again!
*This post with written in collaboration with Vibe With Love Beauty – all opinions expressed are 100% honest and my own*